When fitting wax foundation into frames, centre the sheet vertically, secure it in the frame and embed the wires until they sit flush with the wax. In wired Layens frames, the wires support the sheet and help prevent sagging. Rolling melted wax onto plastic foundation is a separate method for coating it, not a substitute for fitting and securing a wax sheet.
Rolling on wax may seem quicker than positioning a sheet, but the right method depends on the foundation material. This guide explains how foundation guides comb building, how to fit wax into wired Layens frames, how to embed wires without overheating the wax, and how to fix a sheet that is loose, off-centre or poorly waxed.
You’ll also get a clear, practical sequence for preparing the frame and handling the wax gently, so you can make a sound start before the frame goes to the bees. Follow each step in order and you’ll know when a roller is useful, and when the frame needs a properly fitted sheet instead.
Key Takeaways
- Centre the wax sheet and keep it vertical so it gives the bees a clear guide for building comb.
- Embed frame wires until they sit flush with the wax, using controlled heat to avoid damaging the sheet.
- Handle wax foundation gently, especially in cool conditions, and support it properly in wired Layens frames.
- Correct loose or uneven waxing before the frame goes back to the bees, so they’re less likely to build comb into gaps.
- Follow a steady fitting sequence: prepare the frame, position the sheet without force, then secure the top bar evenly.
Embedding frame wires in wax foundation
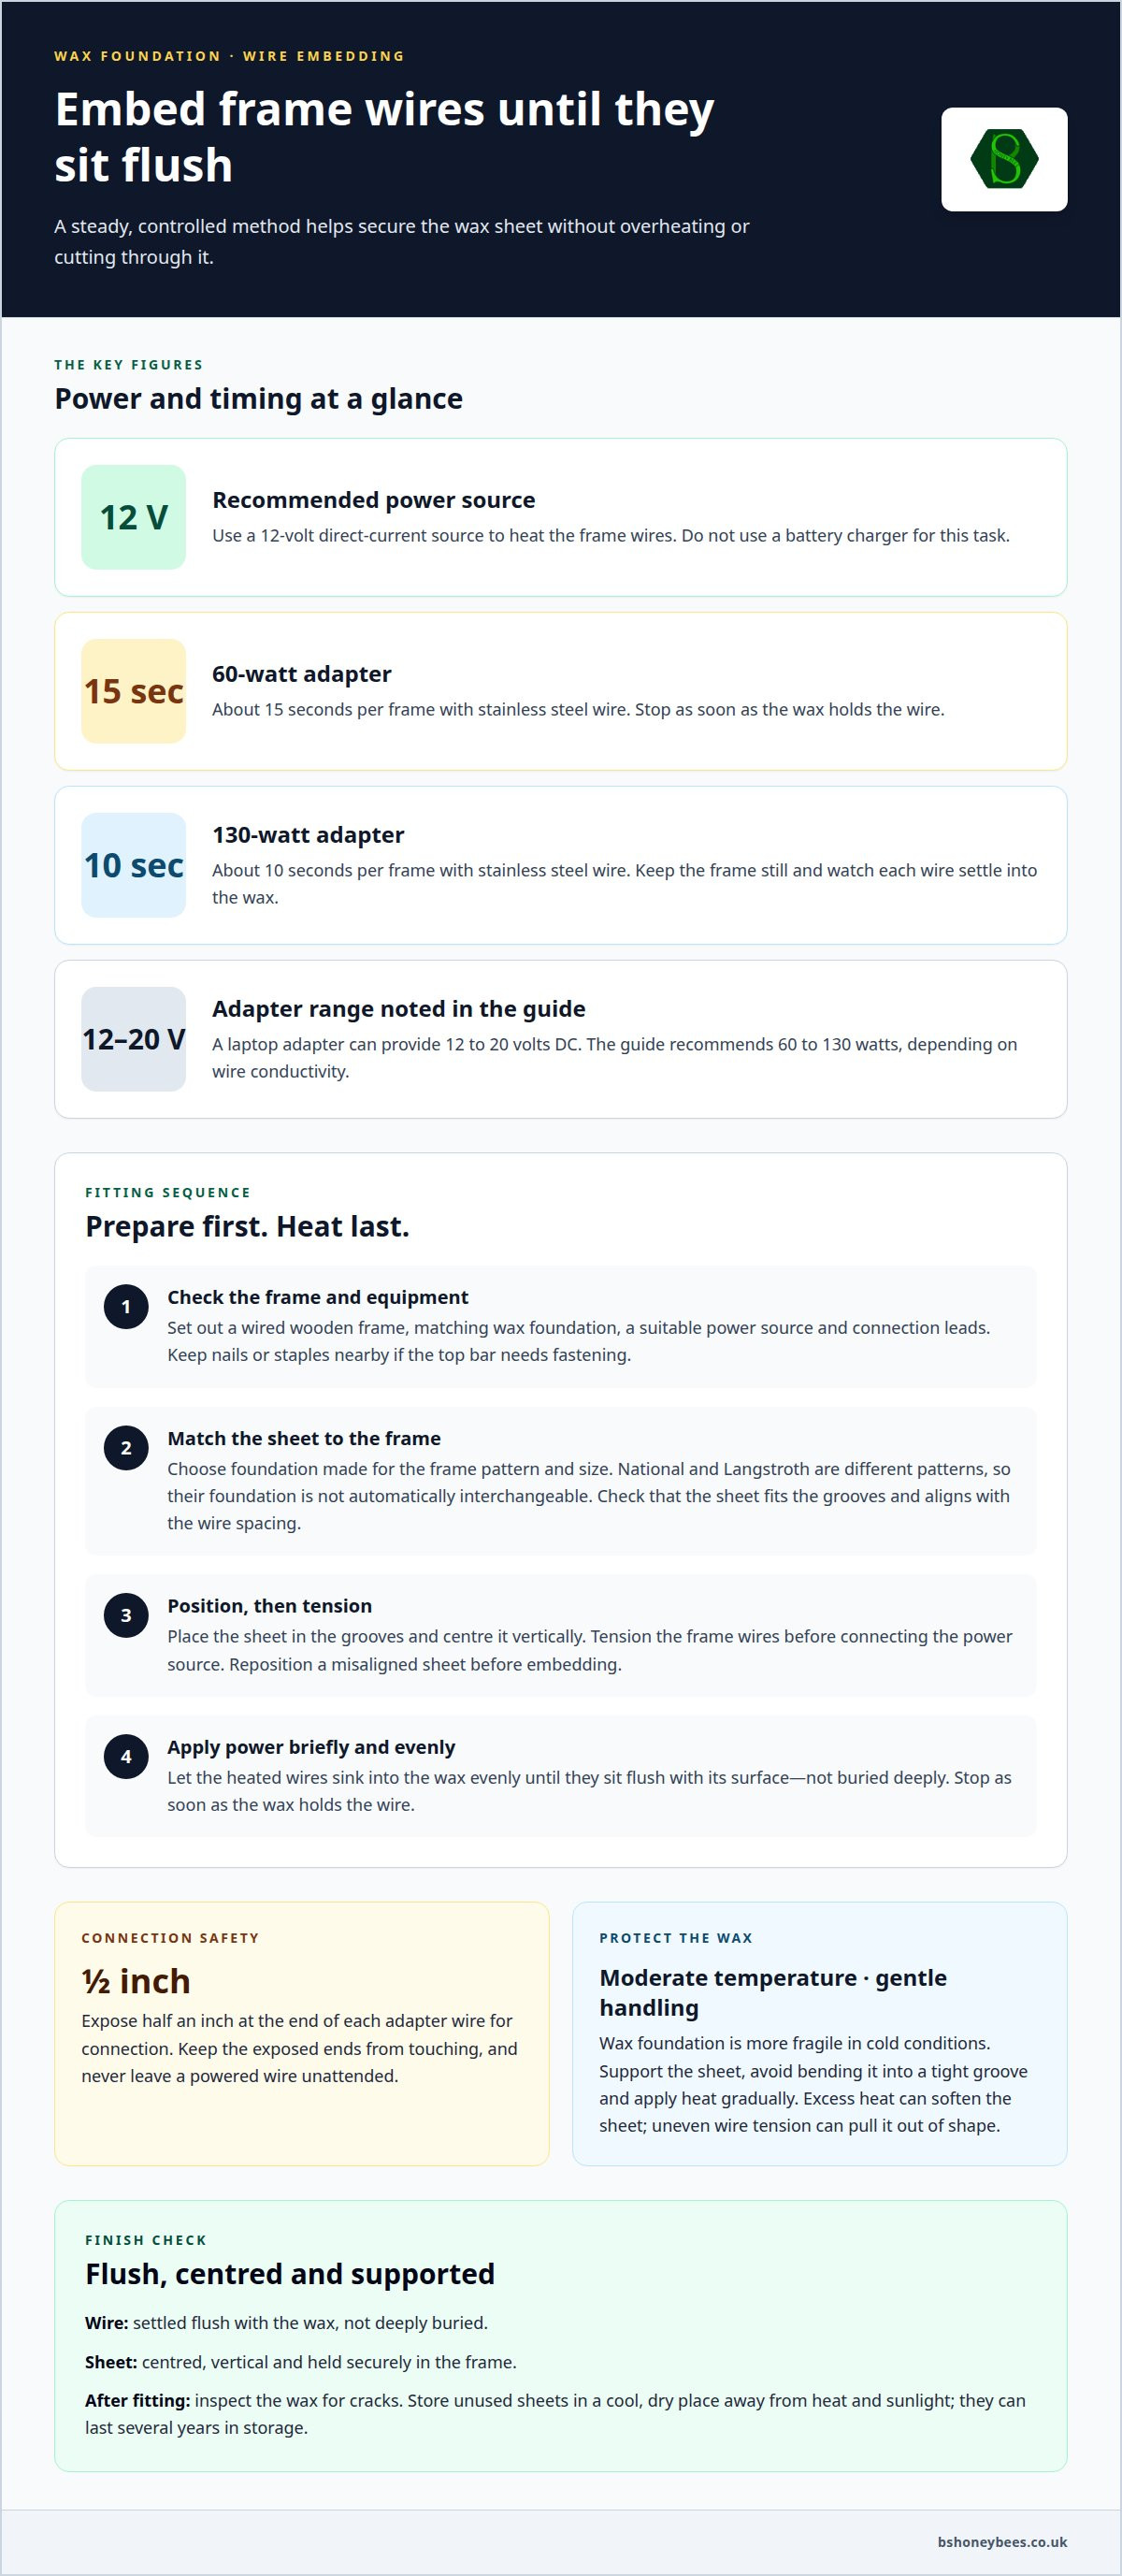
Embed the wires into the wax until they sit flush with its surface. Apply controlled heat and work steadily to avoid overheating the wax or cutting through the sheet.
Gather tools and materials
- Set out a wired wooden frame, matching wax foundation, suitable power source and connection leads. Keep nails or staples nearby if the frame’s top bar needs fastening. A 12-volt direct-current source is recommended for heating frame wires; don’t use a battery charger for this task. Check the leads and frame are ready before positioning the wax.
Choose foundation for the frame
- Select a sheet made for the frame pattern and size, rather than forcing a near match. National and Langstroth are different frame patterns, so their foundation isn’t automatically interchangeable. Check that the sheet sits within the frame’s grooves and aligns with its wire spacing. Deep frames need larger, stronger foundation sheets; keep the sheet flat and correctly oriented before embedding.
Secure foundation in the frame
- Position the sheet in the grooves, then tension the frame wires before connecting the power source. The heated wires should sink into the wax evenly, leaving them flush rather than buried deeply. A 60-watt adapter takes about 15 seconds per frame with stainless steel wire; a 130-watt adapter takes about 10 seconds. Stop as soon as the wax holds the wire.
Prevent buckling and breakage
- Work with the wax in a moderate-temperature space, supporting the sheet as you handle it. Wax foundation becomes more fragile in cold conditions, so don’t bend or press it into a tight groove. Apply heat gradually and watch the wire’s path; excessive heat can soften the sheet, while uneven tension can pull it out of shape. Reposition a misaligned sheet before embedding.
For embedding wire into wax, keep the frame still and apply power only until each wire settles flush. A laptop adapter can provide 12 to 20 volts DC, with 60 to 130 watts recommended depending on wire conductivity. Expose half an inch at the end of each adapter wire for connection, and keep the exposed ends from touching. Never leave a powered wire unattended.
Wax foundation can crack during fitting and is less durable than plastic, so handle it carefully and inspect it before use. Store unused sheets in a cool, dry place away from heat and sunlight; they can last several years in storage. To help prevent disease, keep frames and foundation clean, and avoid moving potentially contaminated comb between colonies. Use fresh, sound material if a frame’s history raises concerns.
What wax foundation is and how it guides comb building
Wax foundation is a sheet fitted inside a frame, giving bees a centred, vertical surface on which to build comb. Fit it shortly before the colony needs the frame rather than leaving it exposed in the hive unnecessarily.
- Fit foundation shortly before giving the frame to bees or setting out swarm traps. During a nectar flow, a strong colony can draw a frame fully in one to two weeks; the first frames for a newly installed package or nuc may take two to four weeks. The difference reflects colony strength and the conditions for drawing comb.
- Treat the embossed cell pattern as a starting guide, not finished comb. It gives bees a surface to build on, while the frame holds that surface in position. Centre the sheet and keep it vertical. If it sits at an angle, the comb may follow, making the drawn frame harder to manage alongside neighbouring frames.
Support bees as they draw comb
- Give the colony a stable, well-supported sheet and keep the frame in its intended position. Wired foundation adds strength, while support wires or pins can help prevent sagging. Check that the sheet stays centred as bees draw comb: a loose edge or unsupported span can leave the finished comb uneven. Avoid repeatedly disturbing the frame while comb is being built.
- For a newly established colony, syrup can support establishment; the stated mix is 80 percent sugar to 20 percent water. Feeding does not replace suitable colony conditions, but it can provide a food source while bees build. Allow time for comb to develop, since a new package or nuc may take two to four weeks to draw its first frames.
Avoid cross-comb
- Keep the foundation vertical and align the frame with its neighbours. The sheet guides comb from its surface; a tilt or wide gap can give bees room to build outside the intended plane. Check alignment before placing the frame, then avoid shifting it once bees start drawing comb.
- When using a wired foundationless frame, install a foundation strip at least 3 inches wide to help prevent cross-comb. That strip provides a central guide where a full sheet is absent. Check that it is firmly positioned and straight. For a frame with wax foundation, use the full sheet’s centred position instead of leaving a gap that invites comb to bridge across.
Match the frame pattern to the hive before choosing foundation; frame formats for British hives help keep that choice aligned.
Installing wax foundation in wired Layens frames
Prepare the Layens frame and wax in a moderate-temperature workspace. Fit the sheet gently, then use the frame’s wires or pins to support it and help prevent sagging.
- Inspect the Layens frame before adding wax. Check that the bars are sound, the joints secure and the wire supports in place. A loose joint or damaged wire can leave the foundation unsupported, even if the sheet fits. Set aside any frame that needs repair before you begin.
- Choose foundation that matches the Layens frame’s pattern and usable space. Layens frames can differ from other hive formats, so don’t assume a National or Langstroth sheet will fit. Compare the sheet with the frame and make sure it sits within the intended edges without bending or forcing it.
- Bring cold wax to a workable temperature before fitting it. Foundation is more fragile when cold, so let a chilled sheet warm gradually in a moderate-temperature space. Handle it with both hands and support its full span. Avoid direct heat, which can soften or distort the wax.
- Position the sheet centrally and vertically in the Layens frame. Guide its edge into the intended groove or support, if the frame has one. Don’t force a corner into place: excessive pressure can crack or bend the wax before the frame wires support it.
- Use the existing support wires or pins to reinforce the wax. Check that each wire contacts the sheet evenly, rather than crossing it at an angle or pulling one edge tighter. Even support helps limit sagging as bees draw comb; uneven tension can distort the foundation inside the frame.
- Embed each wire carefully if the frame design requires it to sit within the wax. Apply controlled heat along the wire until it settles into the sheet, then stop before the wax softens excessively. Keep the frame still during this step. Wiring a wax foundation frame takes 8 to 15 minutes per frame.
- Inspect both sides of the Layens frame before use. Confirm that the sheet is centred, supported and free from cracks, and that no wire protrudes where it could catch during handling. Correct loose supports now; a sagging sheet is harder to stabilise once bees have started drawing comb.
- Keep the completed frame upright as you carry it to the hive. Wax foundation can break during handling, so don’t twist the frame or place weight against the sheet. Once installed, keep the frame in its intended position so the supported wax provides a stable plane for comb building.
Correcting poorly waxed foundation
- Identify the material before making a repair. A wax foundation sheet is already made from wax, while plastic foundation needs a wax coating to encourage bees to draw comb. On a wax sheet, look for cracks, buckling or poor wire contact. On plastic, check for bare patches, thin coverage or unwaxed edges. The repair depends on the material in the frame.
- Remove an under-waxed frame before bees start drawing comb into gaps. If you take it out for waxing, return it within 24 hours to reduce the chance of bees building comb in the empty space. Keep the removed frame upright and protected while you work. This short turnaround matters most when other frames remain accessible to the colony.
- Apply 3 to 5 coats of beeswax to each side of plastic foundation using the cold-rub method. Cover the surface right through to its edges, rather than concentrating wax in the centre. Work in even passes and inspect both faces under good light. Bare edges or streaks can leave parts of the plastic without the wax coating bees need.
- For a melted-wax application, heat the beeswax to approximately 160°F before rolling it onto plastic foundation. Use a controlled layer and keep the wax moving across the sheet. Don’t heat beeswax much above 185°F, as it can darken, smoke and degrade. A roller can spread melted wax, but it doesn’t repair cracked wax foundation or secure loose frame wires.
- Allow the coated sheet to settle, then inspect its edges and both faces. Add another coat where plastic remains visible, keeping the total at 3 to 5 coats per side. Standard medium or deep super frames need a budget of 1 to 2 oz of beeswax per frame. Use that amount as a working allowance, not as a reason to leave thin patches.
- To correct a loose wax sheet, remove pressure points before refitting it. Centre the sheet, restore even support from the frame wires and embed any wire that sits proud. Avoid flexing a cracked sheet repeatedly. Wax foundation is fragile during handling and may need replacing if it cannot lie flat or remain supported.
- Return each corrected frame promptly and keep it aligned with its neighbours. For example, a plastic sheet should have an even wax coating across its face and edges, while a wax sheet should sit securely without buckling. Check the finished frame before installation so bees encounter a continuous, stable surface rather than bare plastic or a loose section.
How to fit wax foundation into a beehive frame step by step?
- Choose a sound wooden frame that matches the foundation sheet. Check the frame pattern, grooves and wire layout before starting. Fitting wax foundation into frames begins with matching the sheet to the frame. Clean and prepare reusable wooden frames, then make sure each bar is secure enough to hold the sheet.
- Warm cold foundation gradually before fitting it. If it has been stored at low temperature, leave it in a heated space for 24 hours. Work in moderate conditions and keep the sheet supported on a flat surface. Wax is fragile during cold handling, so don’t bend it to make a tight or mismatched sheet fit.
- Raise the frame’s bottom bar slightly whilst positioning the foundation. This gives the sheet room to enter the frame without catching against the work surface. Hold the frame steady and keep the foundation aligned with its grooves. Don’t force a corner into place if the sheet resists.
- Slide the lower edge gently into the bottom groove. Keep the wax straight as it moves into position and check that both sides sit within the frame. Excessive pressure can crack or bend the foundation. If the sheet snags, withdraw it carefully and correct its angle before trying again.
- Centre the sheet and keep it vertical inside the frame. Check the margins along both sides and the top before securing anything. An off-centre sheet can guide comb unevenly, while a tilted sheet may encourage comb to follow the same angle. Correct its position before the wedge top bar locks it in place.
- Press the wedge top bar evenly over the foundation. Fasten it with nails or staples to prevent movement, applying consistent pressure across the bar. Uneven fastening can pinch one edge and leave the other loose. Check that the sheet is still centred once the bar is secured.
- Support wired foundation by embedding its frame wires into the wax. Connect a suitable 12-volt direct-current source and apply power only until the wires sit flush. Stop before overheating the sheet. Unwired wax foundation needs additional support, such as pins or cross-wiring, to help prevent sagging.
- Inspect the completed frame from both sides. Look for cracks, buckling, loose edges, protruding wires or a shifted top bar. Correct any faults before putting the frame in the hive. Fit foundation shortly before use rather than leaving a prepared sheet exposed in the hive.
- For frames that match your hive, browse British National hives and frames as you plan your next comb-building setup. Careful fitting wax foundation into frames helps keep each sheet supported and ready for the bees.
BS Honey Bees Ltd: 5 / 6 Frame Nucs
BS Honey Bees Ltd offers 5 / 6 Frame Nucs for beekeepers preparing to establish a colony and put correctly fitted frames to use. Pair your colony plans with suitable equipment: British National Hives & Frames provide a relevant option for a British National setup. If you’re also considering queen stock, BS Honey Bees Ltd offers F1 Buckfast Queens and Carniolan Queens. Choose the combination that suits your apiary plans, then prepare the hive and frames before introducing bees. For help with your next step, contact BS Honey Bees Ltd.
Prepare your next frames with confidence
Make frame preparation part of your wider apiary plan. Before adding a frame, consider which hive it will fit, how the colony will use it and whether the foundation is ready to install. Careful fitting gives you a consistent starting point for the next stage of comb building.
As your plans develop, you may also be considering colony stock. BS Honey Bees Ltd offers F1 Buckfast Queens, Carniolan Queens and 5 / 6 Frame Nucs. The right next step depends on what you’re preparing for, whether that’s expanding an apiary or establishing a colony. Keep your frame and hive choices aligned with that plan.
Contact BS Honey Bees Ltd for help with your beekeeping plans. Take the next step at a pace that suits your apiary, and build from a setup you’ve prepared with care.
Frequently Asked Questions
Can I use melted wax and a roller instead?
Yes. Use melted wax and a roller to coat plastic foundation, not to secure a wax sheet in a frame. Roll a thin, even layer across the plastic, including its edges, then check for bare patches. This method suits foundation that needs a wax coating to encourage comb building. For a beeswax sheet, position and support it in the frame instead.
Can I use traditional wax and wire foundation instead of plastic?
Yes, wired wax foundation is an alternative to plastic foundation. Its embedded wires support the wax sheet, while plastic foundation is stronger and reusable. Bees may take longer to accept plastic, so the choice affects handling and how the colony responds. For example, choose wired wax if you prefer a wax sheet, and handle it carefully during fitting and storage because it can crack more easily.
How do I embed the wire into the wax?
Use a controlled heat source to warm the frame wire until it settles into the wax surface. Support the sheet and keep the frame still, stopping as soon as the wire sits level with the wax. Work along the wire without lingering in one spot. If the wax begins to soften or the wire sinks too deeply, disconnect the power and let the frame cool.
What wire should I use, and how tight should it be?
Stainless frame wire lasts longer than tin-plated mild-temper carbon steel wire, but costs roughly three times as much. Whichever type you choose, tension it so it stays straight and supports the foundation without bowing the frame. Slack wire can leave the wax poorly supported; excessive tension can pull the frame bars inward. Check the wire’s path and the frame’s shape before embedding.
How do you fit wax foundation into wooden and plastic frames?
For a wooden frame, slide the sheet gently into its groove, centre it, then secure the wedge top bar evenly. With a plastic frame, use a compatible foundation sheet and secure it with the frame’s intended retaining features. Frame designs differ, so don’t force wax into a tight slot or assume a wooden-frame wedge will suit a plastic frame.
How do you embed wired wax foundation using an electric embedder or spur embedder?
An electric embedder heats frame wire by passing current through it; a spur embedder presses the wire into the wax with a heated, toothed wheel. For electric embedding, connect the leads to the wire and stop once it sits flush. With a spur, roll steadily along the wire without cutting through the sheet. Support the frame and check both sides afterwards.
What size wax foundation fits standard UK National and Langstroth frames?
Choose foundation made for the specific frame pattern and size. National and Langstroth foundation are not automatically interchangeable.